A Shopify Attribution report should include the following elements:
1. Impressions
2. Clicks
3. Ad Spend
4. Conversion Value
5. Campaign Name
6. Date
7. Product Name
8. Order ID
9. Customer ID
10. Attribution Model
These components help in analyzing the effectiveness of marketing efforts and understanding customer behavior in e-commerce.
To analyze Shopify Attribution data, follow these steps:
1. **Data Collection**: Gather data on impressions, clicks, ad spend, conversion value, campaign name, date, product name, order ID, customer ID, and attribution model.
2. **Identify Key Metrics**: Focus on key performance indicators such as click-through rate (CTR), conversion rate, return on ad spend (ROAS), and cost per acquisition (CPA).
3. **Attribution Model Analysis**: Understand the attribution model used (e.g., last-click, first-click) to determine how credit is assigned to different touchpoints in the customer journey.
4. **Campaign Performance**: Compare the performance of different campaigns by analyzing metrics like conversion value and ad spend to identify the most effective campaigns.
5. **Customer Insights**: Use customer ID and order ID data to track customer behavior and identify patterns in purchasing decisions.
6. **Product Performance**: Analyze product-specific data to determine which products are driving the most conversions and revenue.
7. **Time-Based Analysis**: Examine data over different time periods to identify trends and seasonal patterns.
8. **Optimization**: Use insights gained to optimize ad spend, adjust targeting, and improve overall marketing strategy.
By systematically analyzing these components, you can gain a comprehensive understanding of your Shopify Attribution data and make informed decisions to enhance your e-commerce performance.
To build a Shopify Attribution dashboard, follow these steps:
1. **Data Collection**: Gather data from Shopify and your PPC platforms. Key metrics include impressions, clicks, ad spend, conversion value, campaign name, date, product name, order ID, customer ID, and attribution model.
2. **Data Integration**: Use a data integration tool to consolidate data from Shopify and PPC platforms into a single database or data warehouse.
3. **Choose a Dashboard Tool**: Select a dashboard tool that supports data visualization and can connect to your data source. Popular options include Google Data Studio, Tableau, or Power BI.
4. **Design the Dashboard**: Create visualizations for key metrics. Include charts for impressions, clicks, ad spend, and conversion value. Use tables to display campaign names, product names, and attribution models.
5. **Apply Filters and Segmentation**: Implement filters for date ranges, campaigns, and products to allow for detailed analysis.
6. **Test and Iterate**: Ensure the dashboard accurately reflects your data and provides actionable insights. Make adjustments as needed based on user feedback.
7. **Automate Updates**: Set up automated data refreshes to keep the dashboard up-to-date with the latest information.
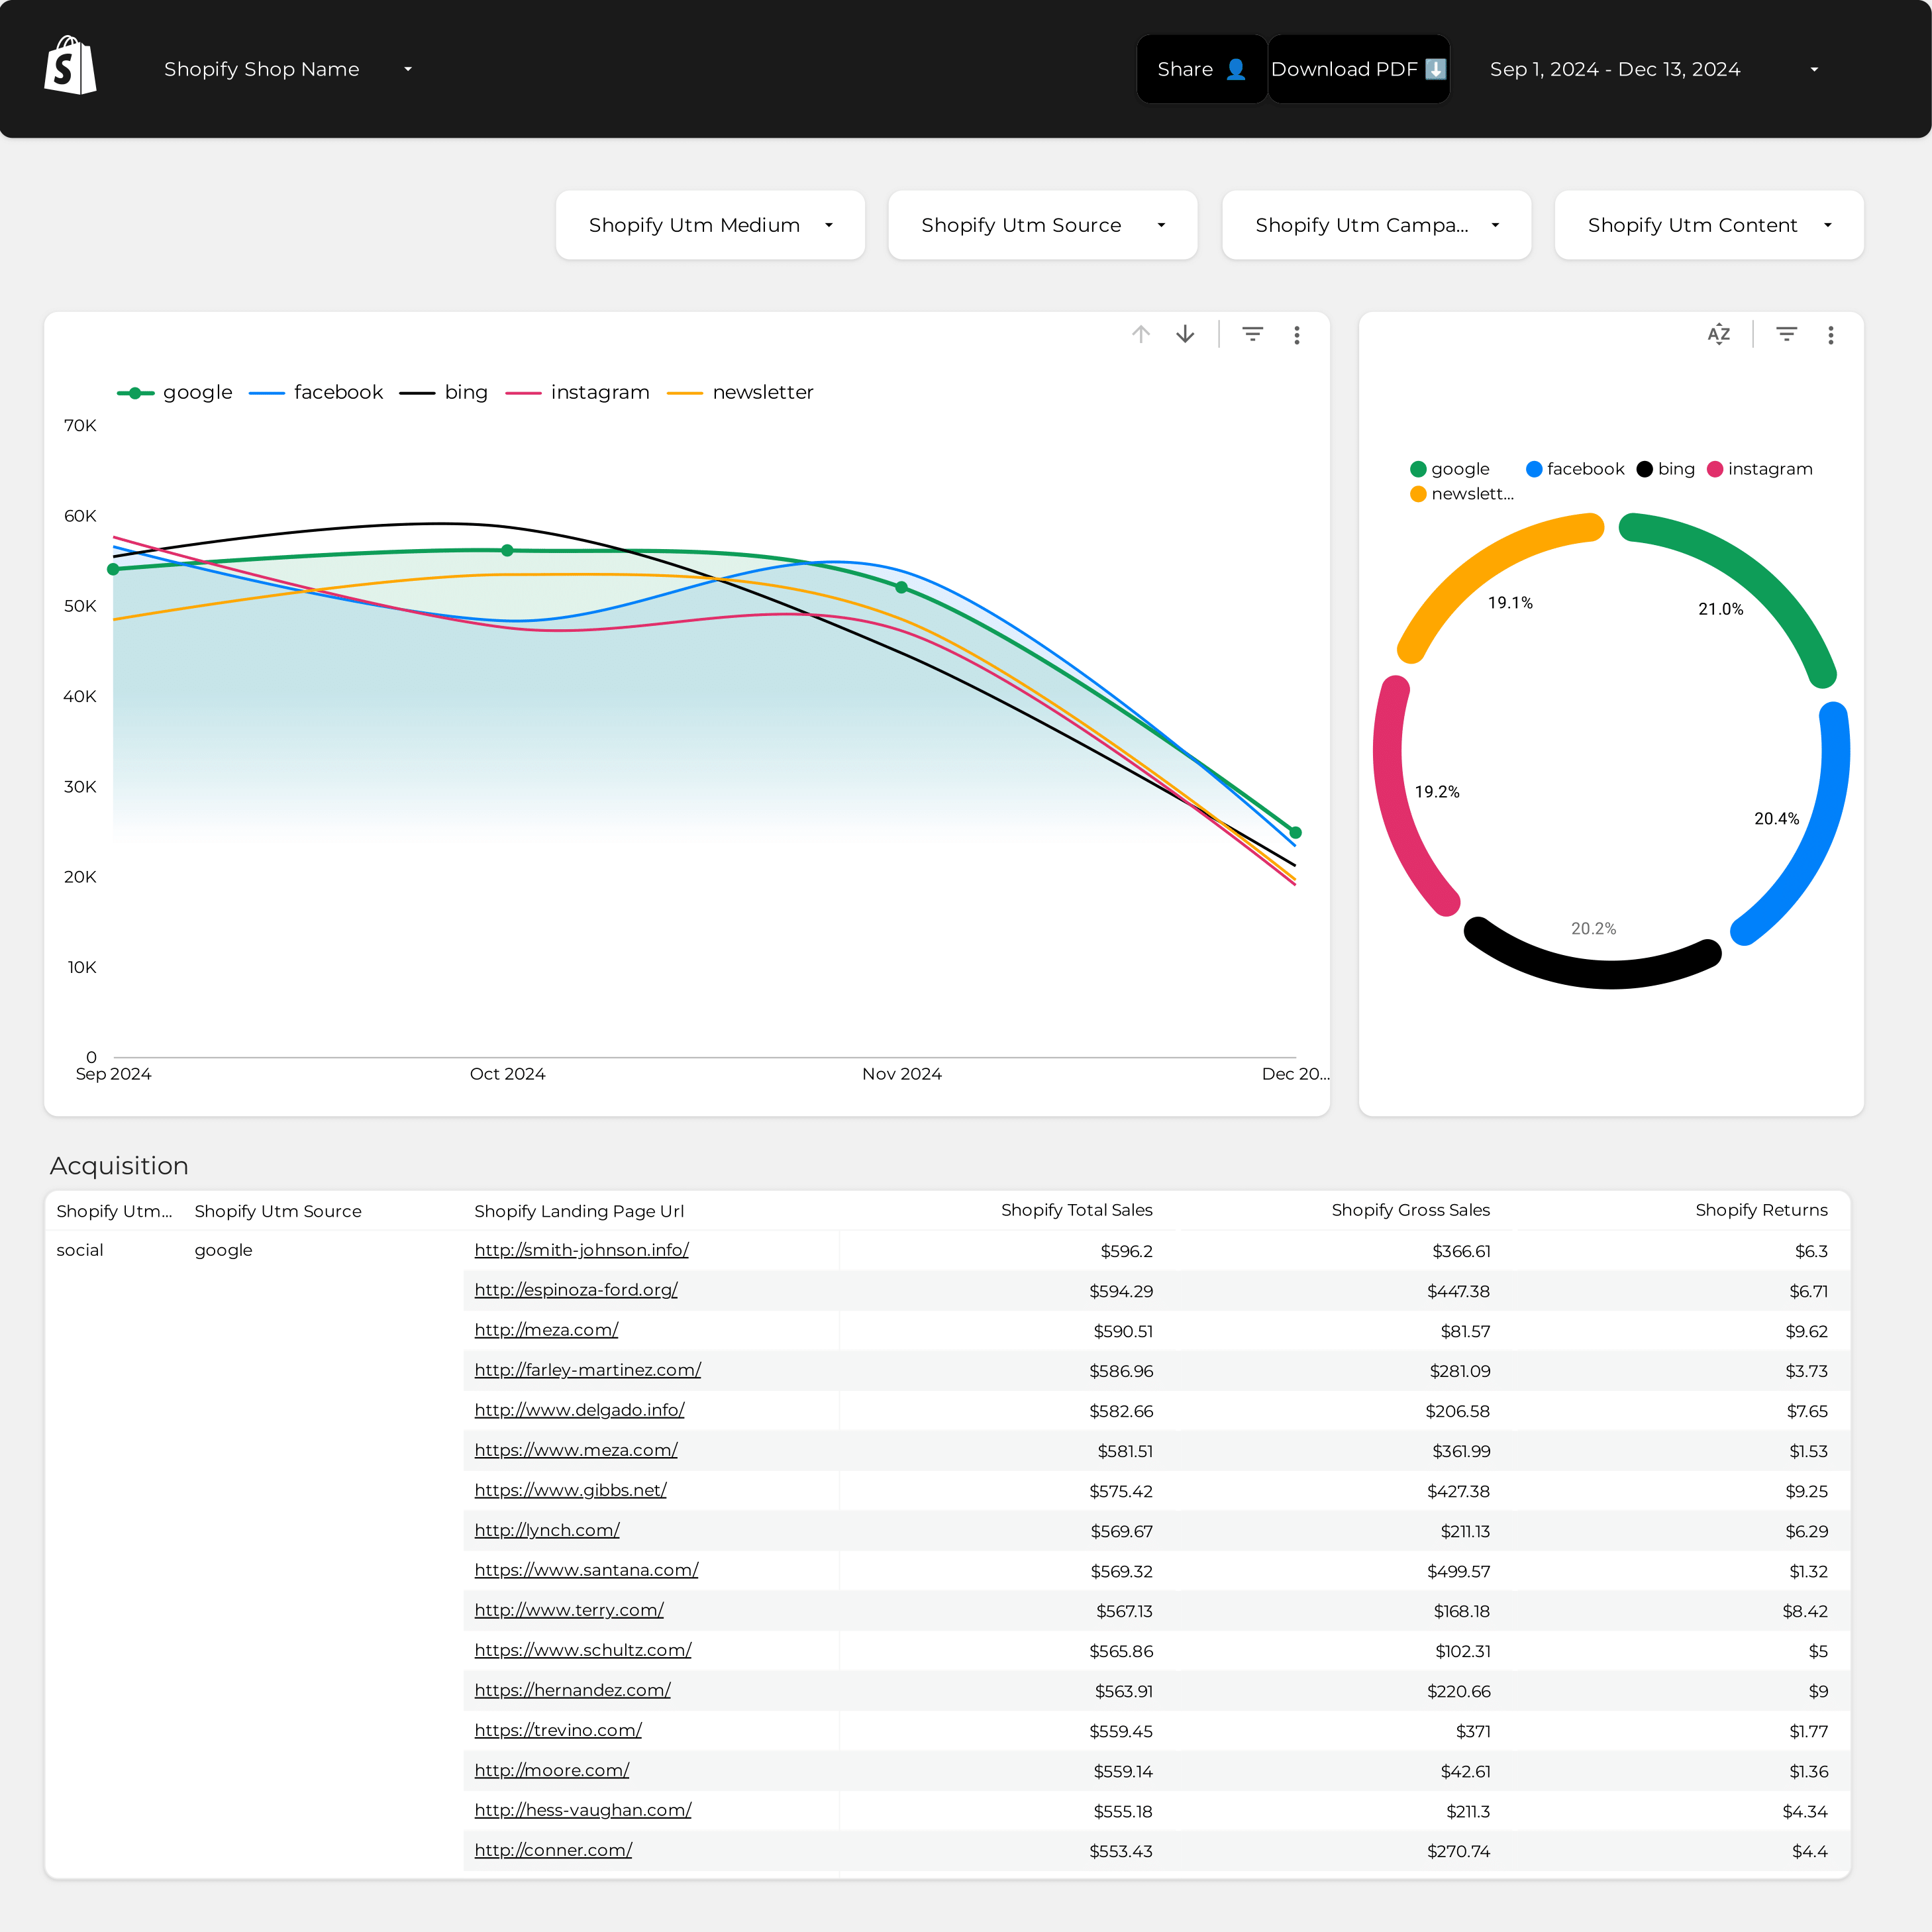
A Shopify Attribution dashboard is a tool used to track and analyze the performance of marketing efforts in an e-commerce setting, specifically for Shopify stores. It provides insights into how different marketing channels, such as PPC (pay-per-click) campaigns, contribute to sales and conversions. The dashboard typically includes metrics like impressions, clicks, ad spend, conversion value, and details about campaigns, products, orders, and customers. It helps businesses understand the effectiveness of their marketing strategies and optimize their advertising spend by using various attribution models.
I don’t know if you can download the template in PDF format based on the provided context.


 Shopify
 Impressions