






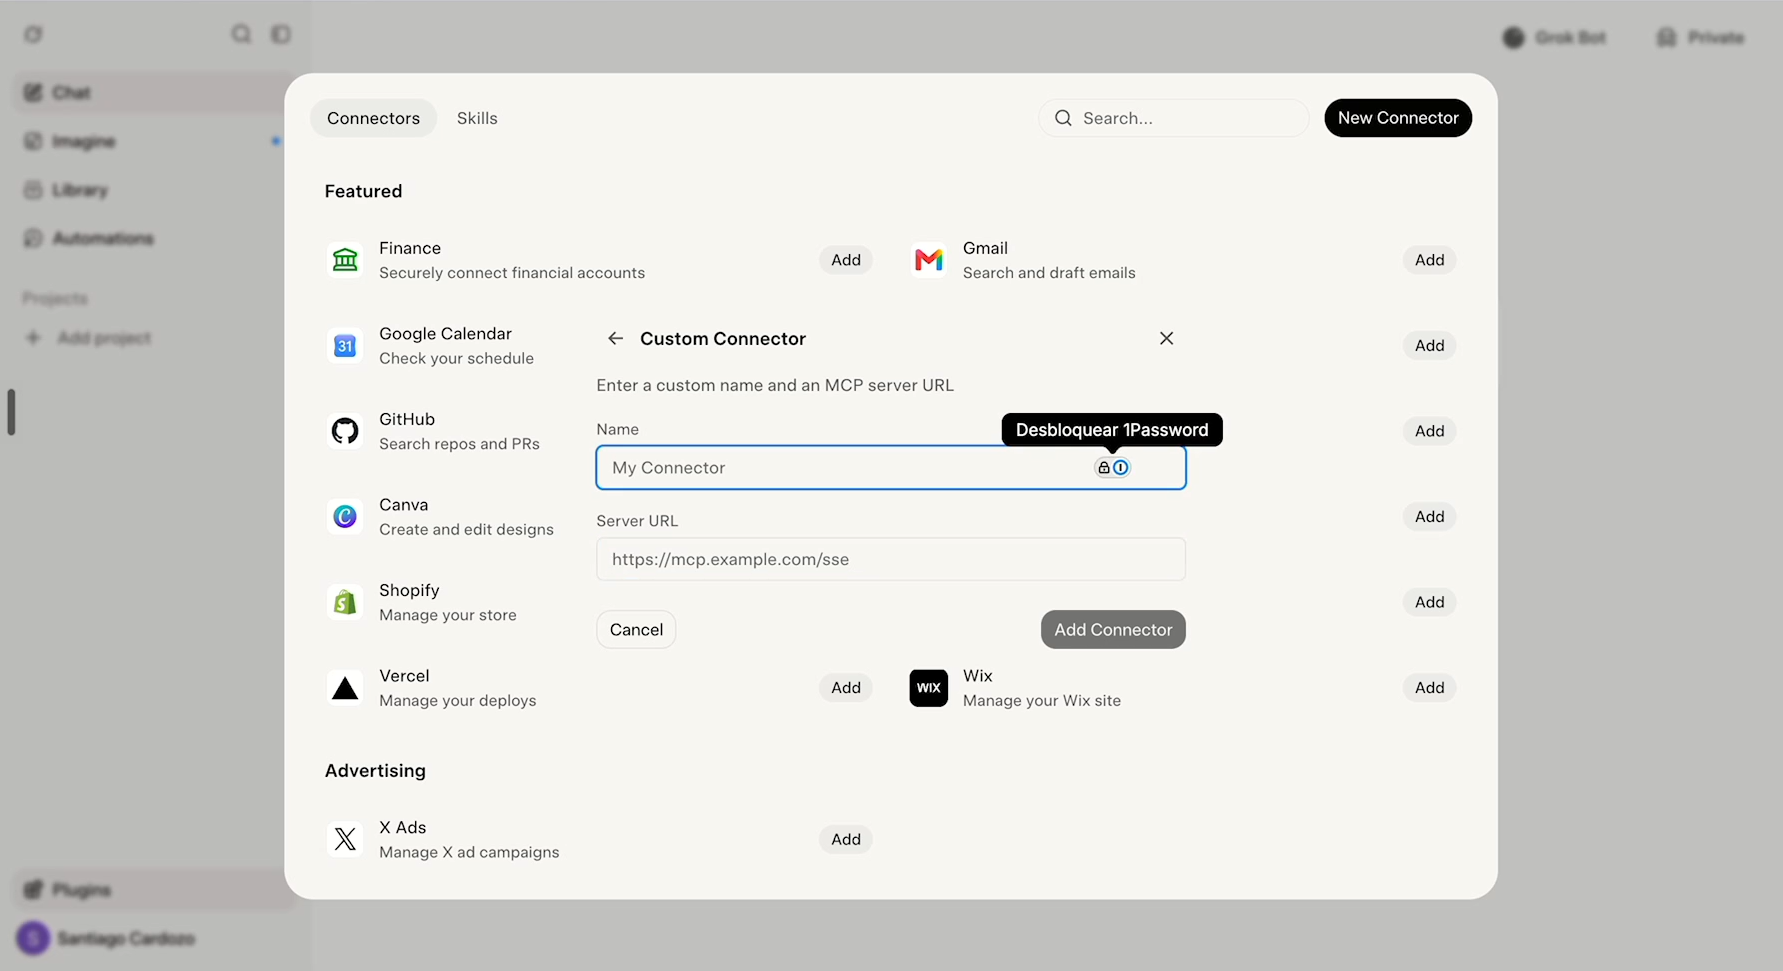
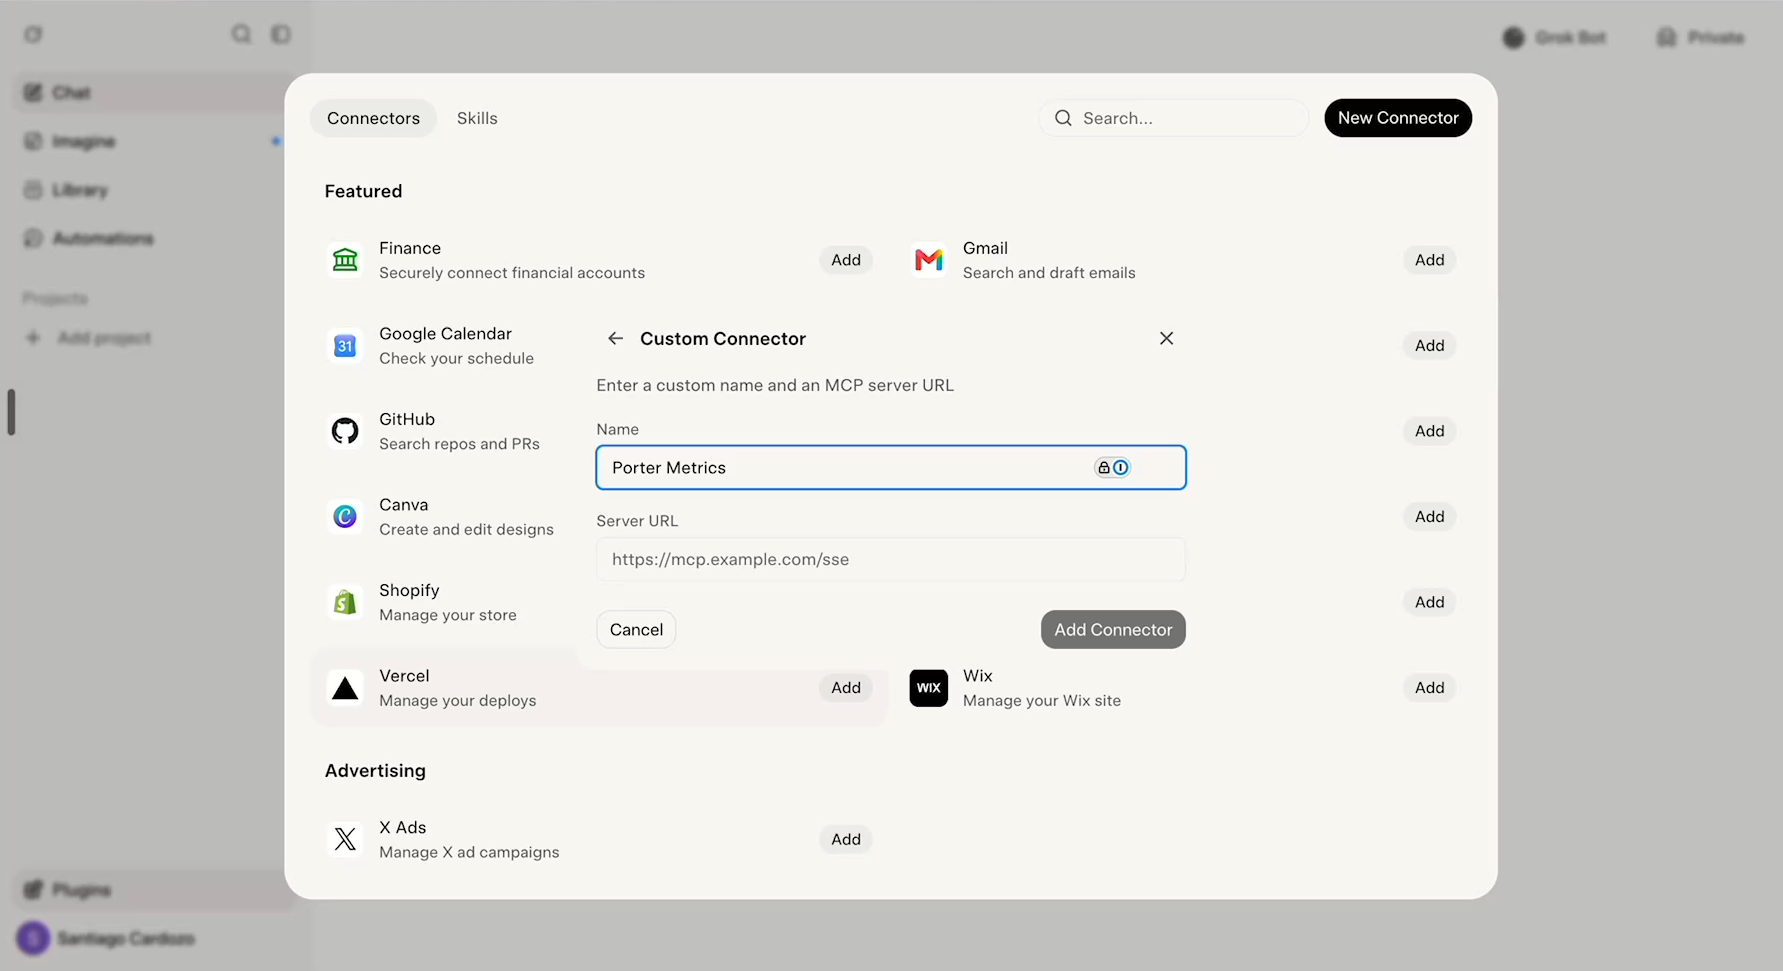
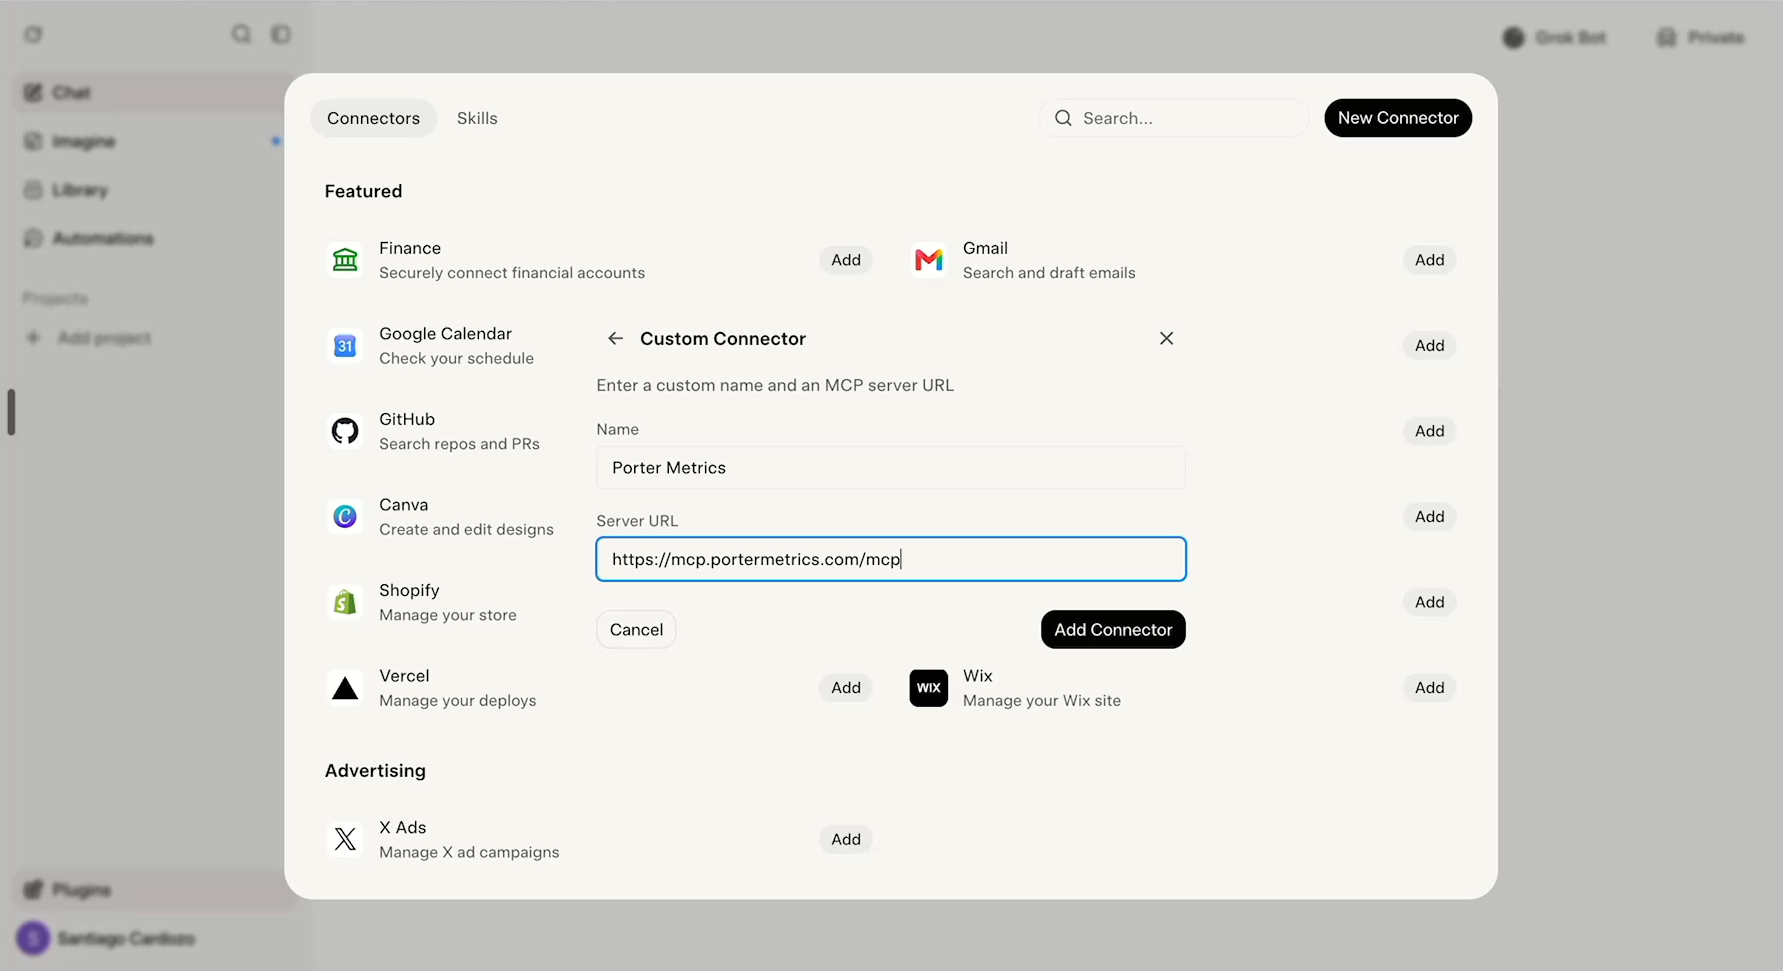
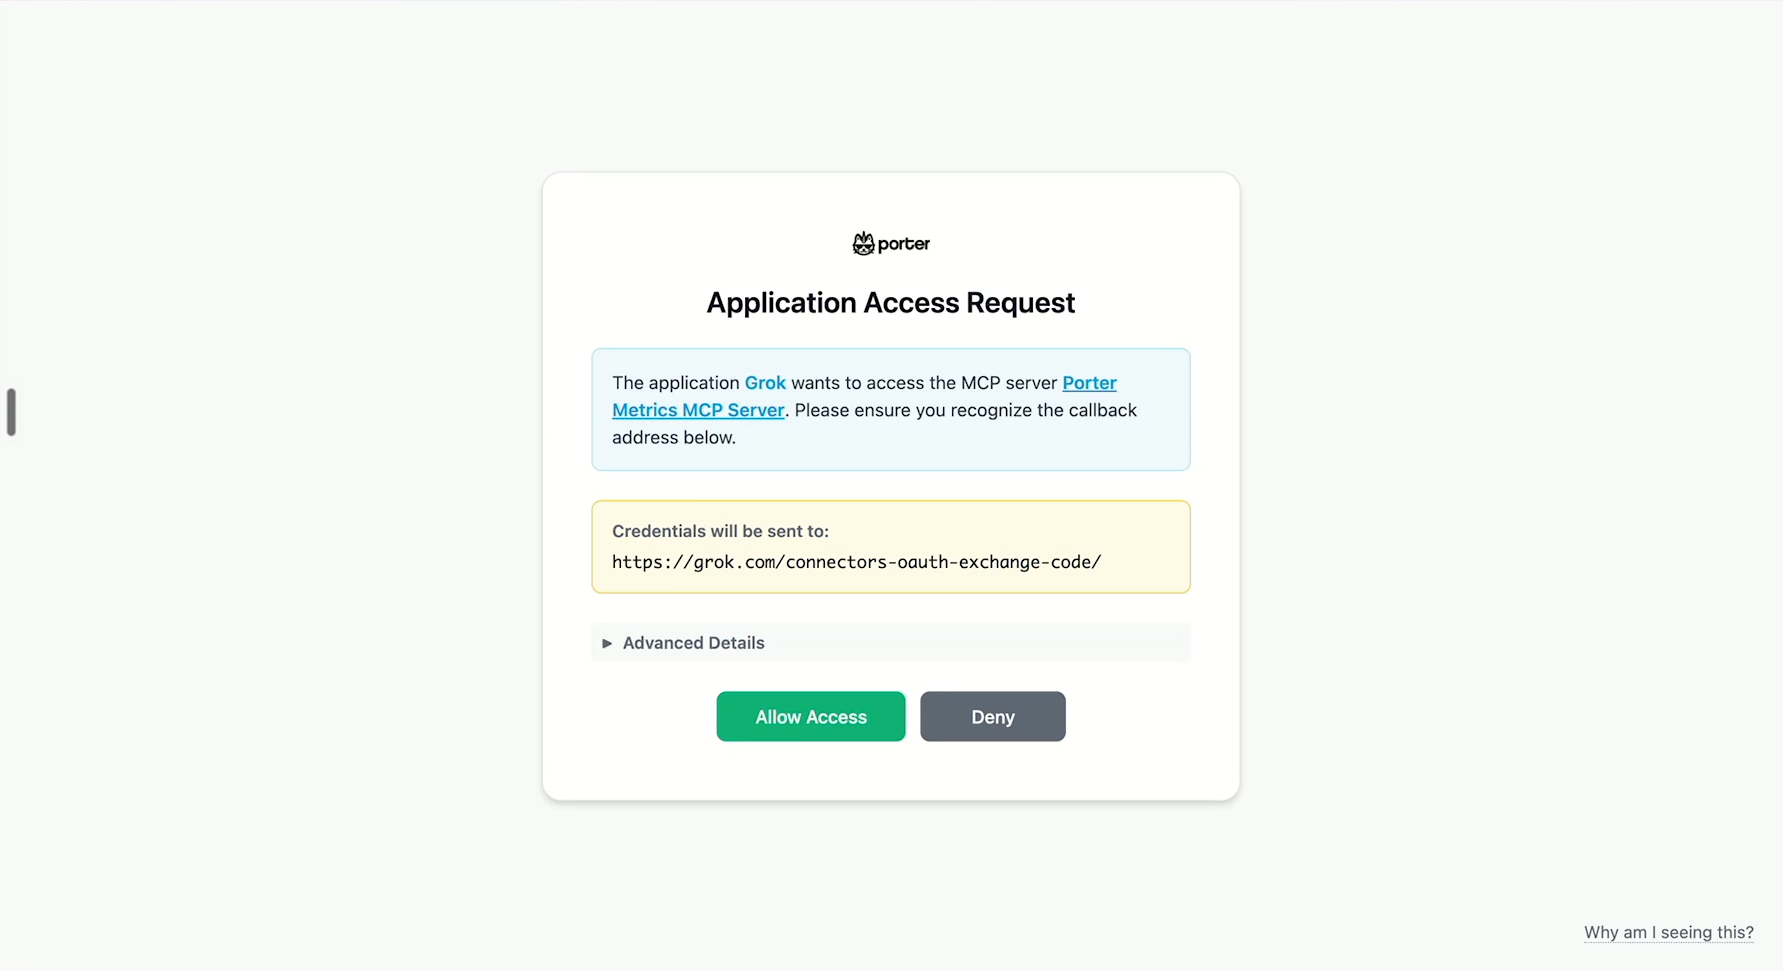
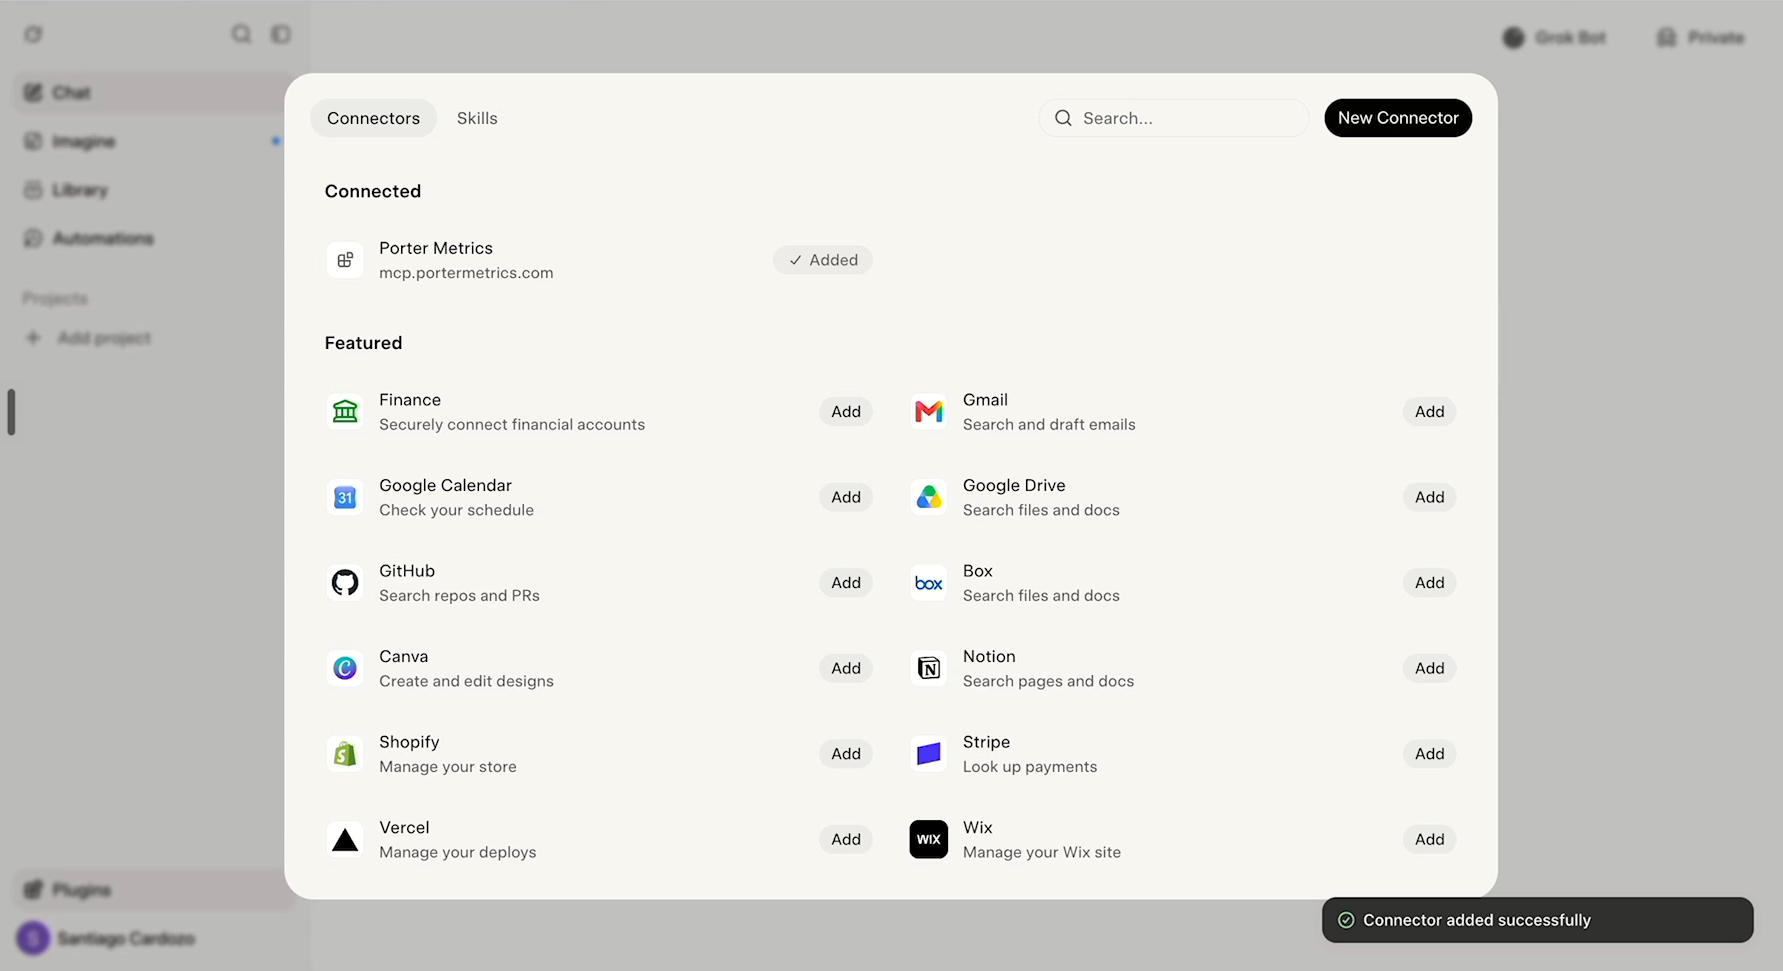
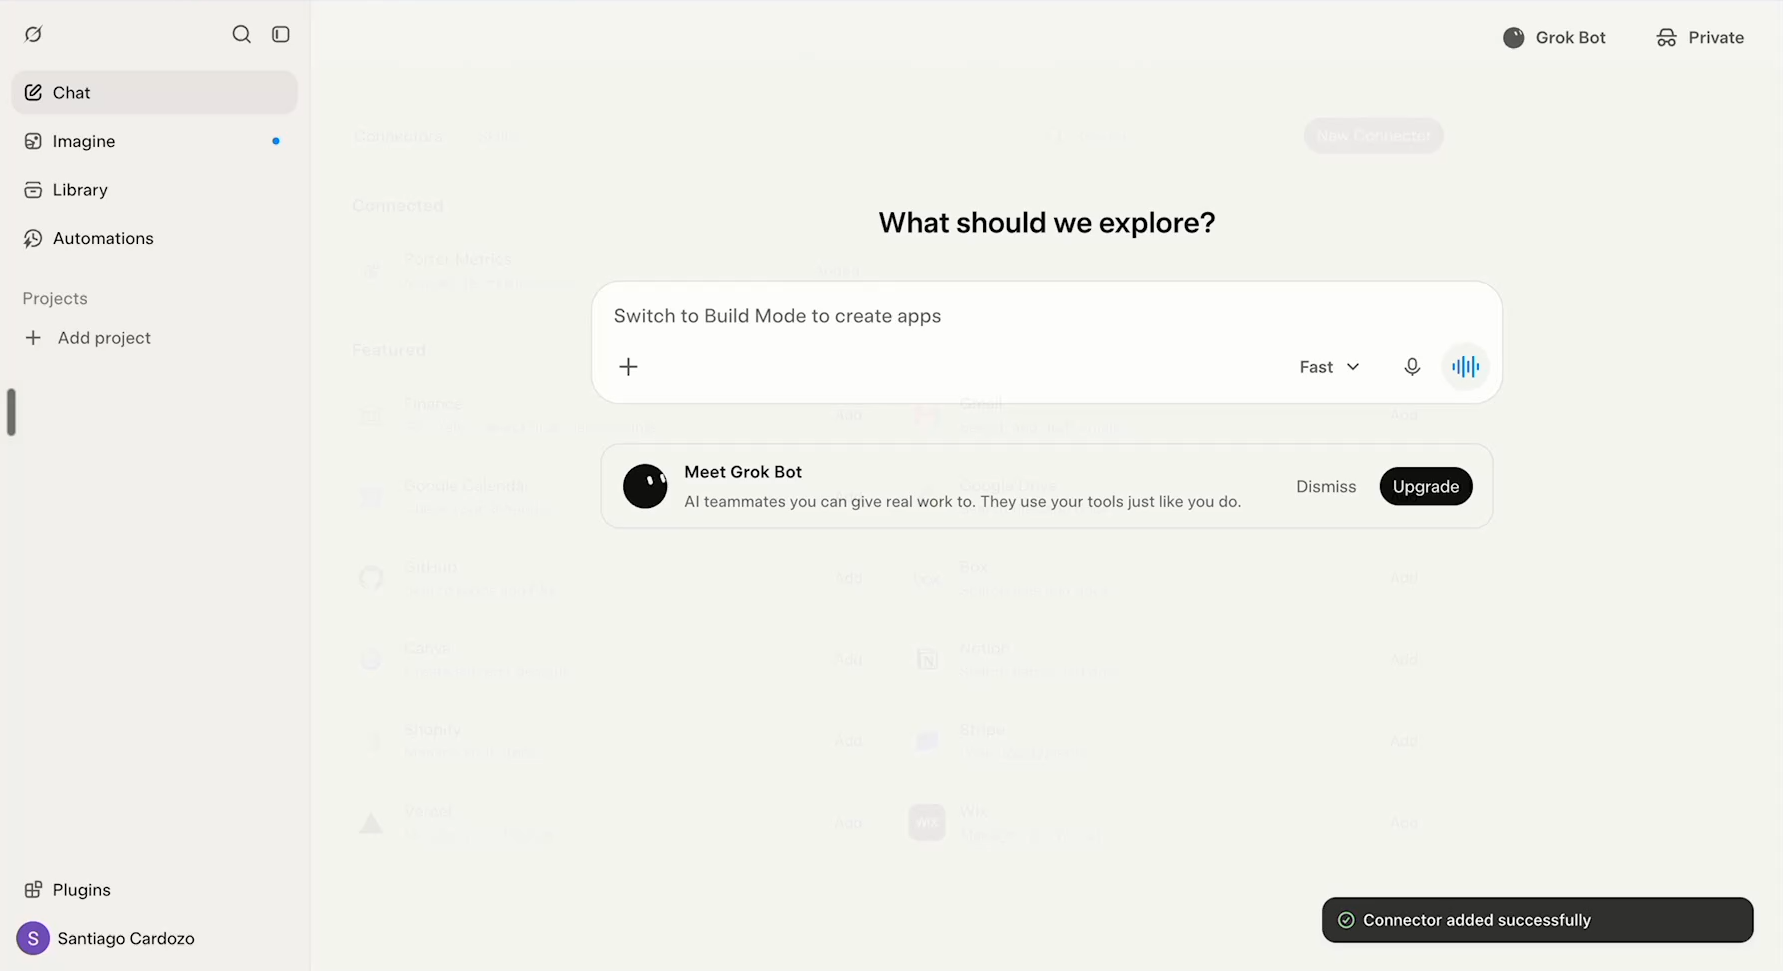
Open Grok → Connectors → New Connector → Custom. Name the connector Porter Metrics, enter https://mcp.portermetrics.com/mcp in Server URL, and click Add Connector. Review the authorization request and click Allow Access. Wait until Porter Metrics appears under Connected with the status Added and the message Connector added successfully.
Porter Metricshttps://mcp.portermetrics.com/mcpPaste this URL into the Server URL field when adding the custom MCP server.
What is the Porter Metrics MCP?
An MCP is a way to plug tools into your AI chats. Think of it like a USB port for AI: once a tool has an MCP, any AI chat can connect to it and use its data. And because the standard is universal, the same MCP works everywhere — Grok, Claude, Gemini, Cursor, Antigravity, Lovable, and any other AI tool that accepts APIs or MCPs.
The Porter Metrics MCP brings all your marketing data into those AI tools. The same connectors you use today to send data to Google BigQuery, Google Sheets, or Data Studio — Google Ads, Meta Ads, TikTok Ads, LinkedIn Ads, Shopify, HubSpot, GA4, Search Console, and 20+ more — are now available inside Grok (and any other MCP-compatible AI).
Why it matters for marketers
With the Porter MCP, you stop waiting on data pulls and start acting on them. Concrete things you can do today:
- Ask questions and get instant answers: “Which Meta Ads campaigns had the highest ROAS last week?” or “Compare Google Ads cost vs. GA4 revenue this month.” Grok pulls the numbers and explains them.
- Spin up dashboards inside the chat: ask for a weekly performance view and get charts, tables, and a summary ready to share — no Data Studio setup required.
- Generate client-ready reports on demand: “Draft this month’s report for Client X with Google Ads spend, GA4 sessions, and Shopify revenue.” Paste it into Slack, email, or a doc.
- Diagnose performance dips: “Why did our ROAS drop on Tuesday?” Grok looks at your campaigns, channels, and landing pages and explains what changed.
- Build your own marketing apps: combine the Porter MCP with Grok, an agent framework, Cursor, or Lovable to create internal tools — lead scoring flows, automated alerts, attribution models — without being a developer.
- Prepare recurring reports: ask for a Monday-morning KPI digest, anomaly review, or client update.
Prerequisites: what you need before you start
Before you connect Porter to Grok, make sure you have the following ready:
- A Porter Metrics account with your marketing data connected (start a free trial if you don’t have one).
- A Grok account with access to custom MCP servers. Availability depends on your plan and workspace settings.
- ~5 minutes to complete the full setup.
Step 0 — Connect your marketing data to Porter first
Grok reads your data through Porter, so the first thing you need are your marketing accounts connected inside Porter. If you already use Porter with Data Studio, Google Sheets, or BigQuery, you can skip this step — every account you connected before is automatically available to Grok too. Connect once, use everywhere.
If this is your first time:
- Sign in to Porter (or start a free trial).
- In the top-left corner of the app, click the + Create button.
- Pick a destination for your data — Data Studio, Google Sheets, or BigQuery. It doesn’t matter which one you choose first: any marketing account you authorize here becomes available across all destinations, including Grok via the MCP.
- Choose the platform you want to connect (Google Ads, Meta Ads, TikTok Ads, GA4, Shopify, HubSpot, etc.) and sign in with the account that owns the data — for example, the Facebook profile that has access to your Meta Ads account, or the Google account that owns your Google Ads.
Once at least one source is connected in Porter, those accounts are ready to use in Grok.
How to connect Porter Metrics to Grok
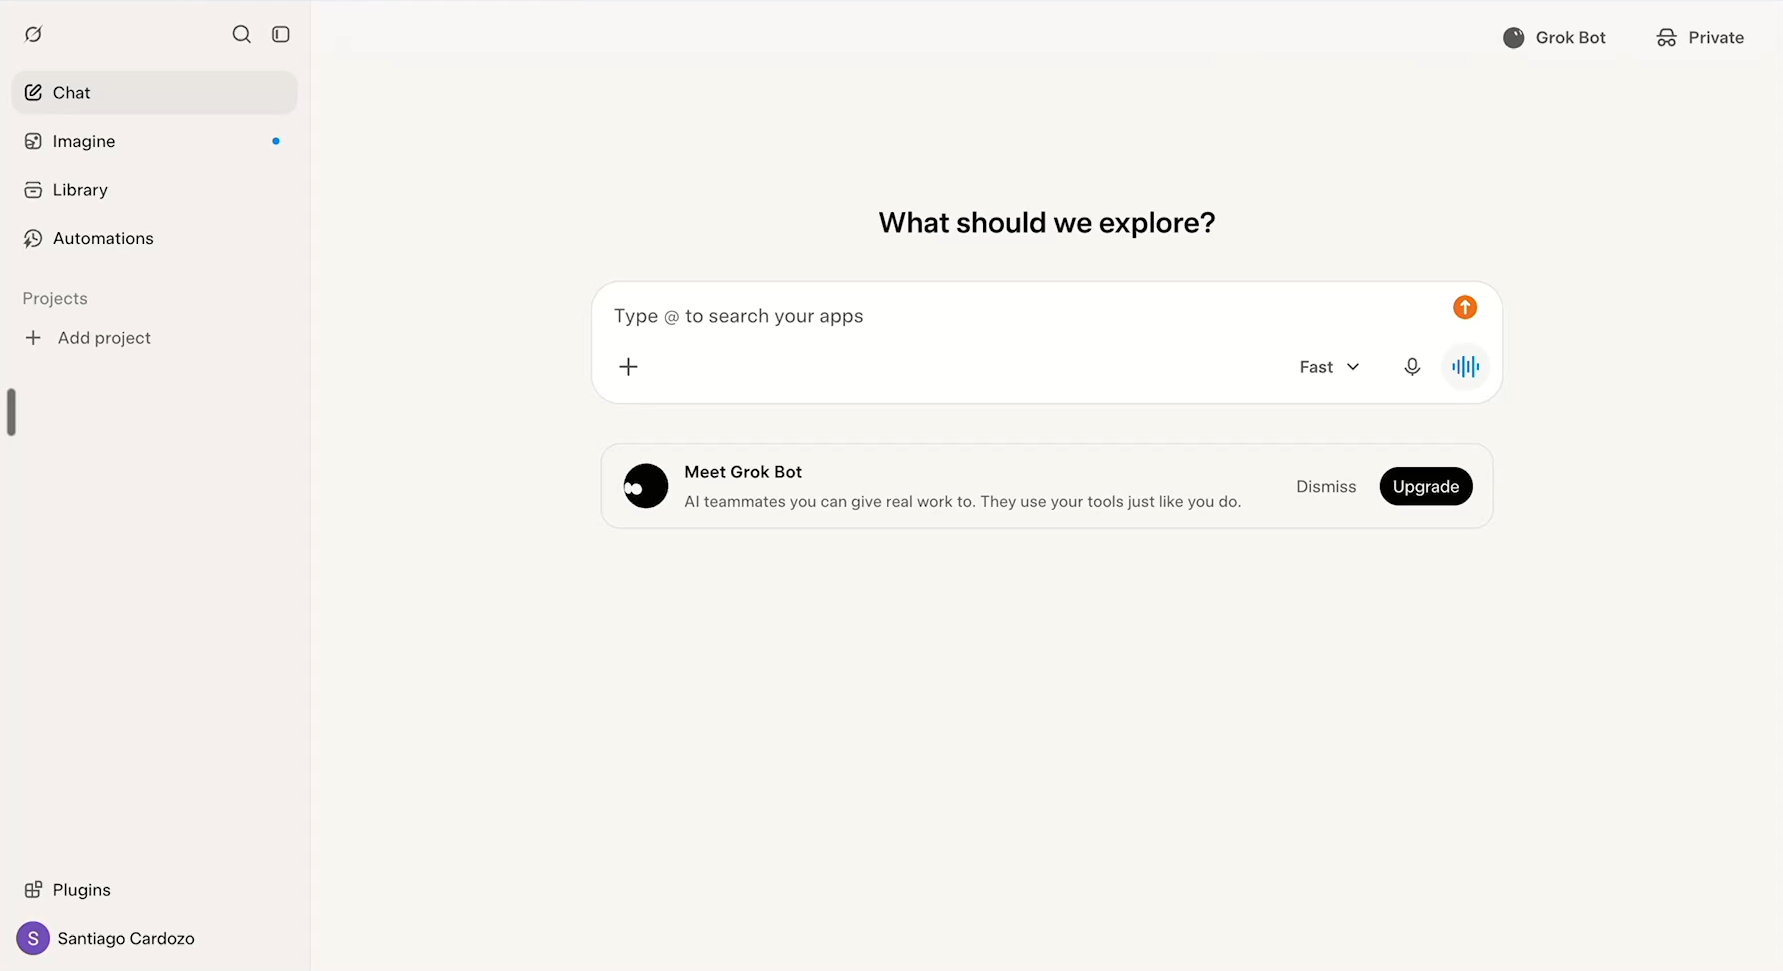
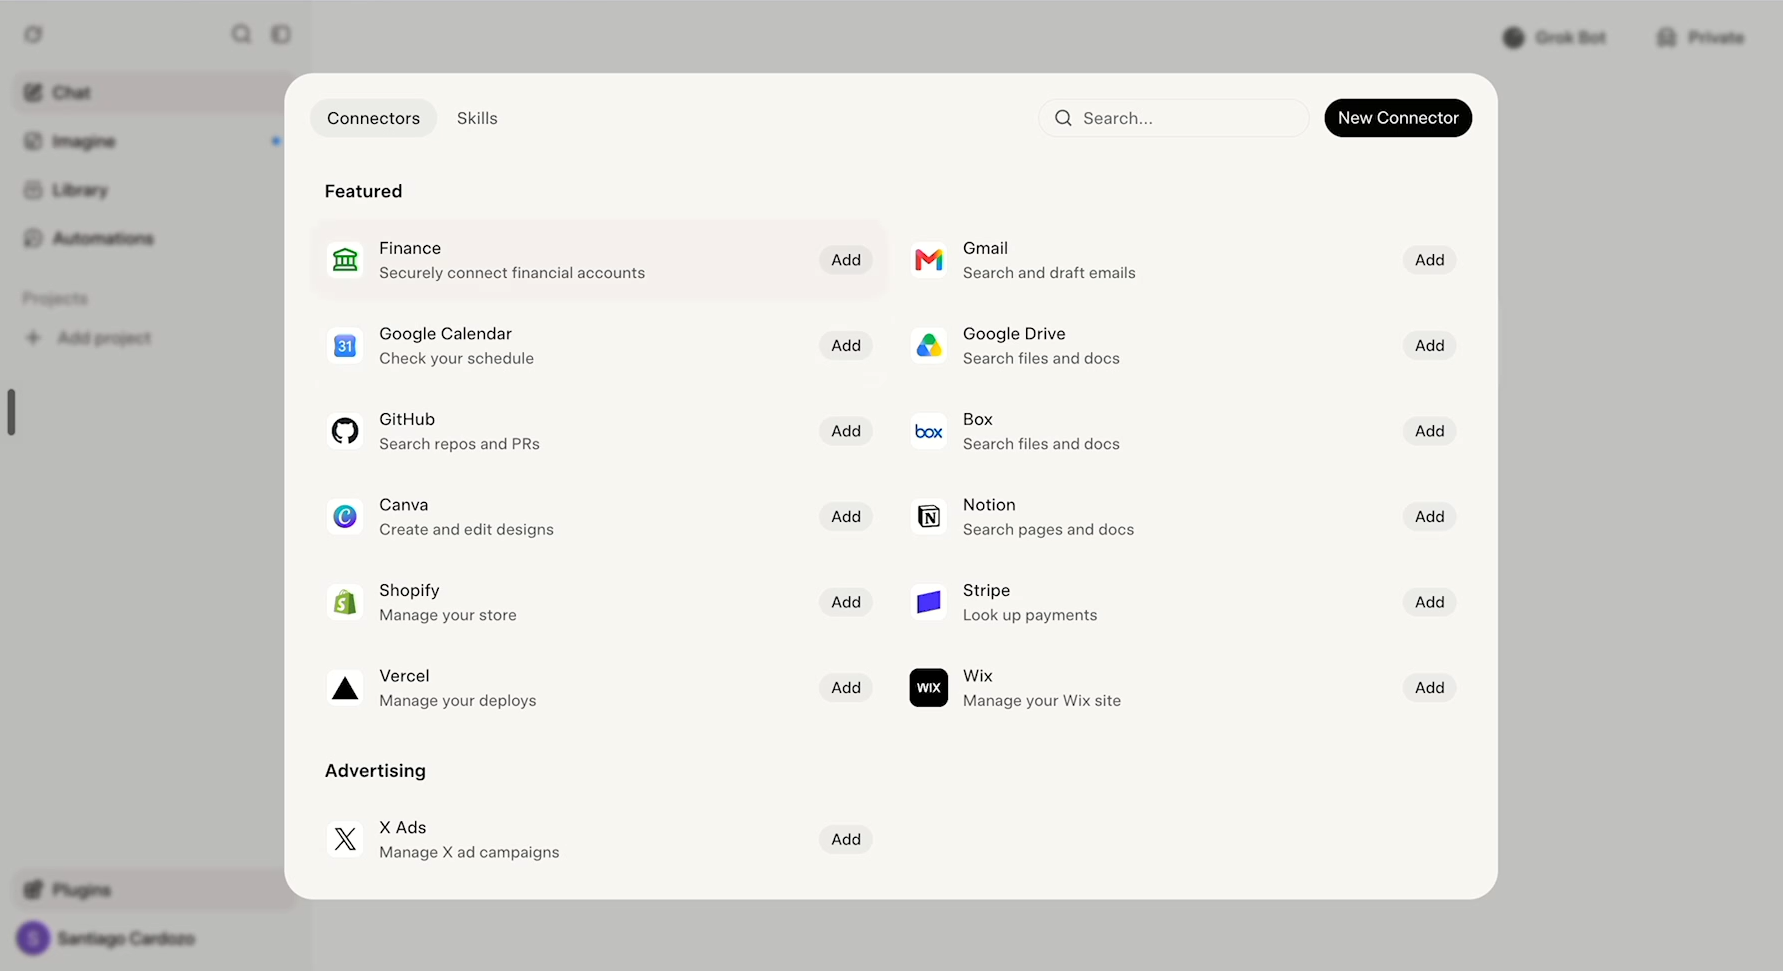
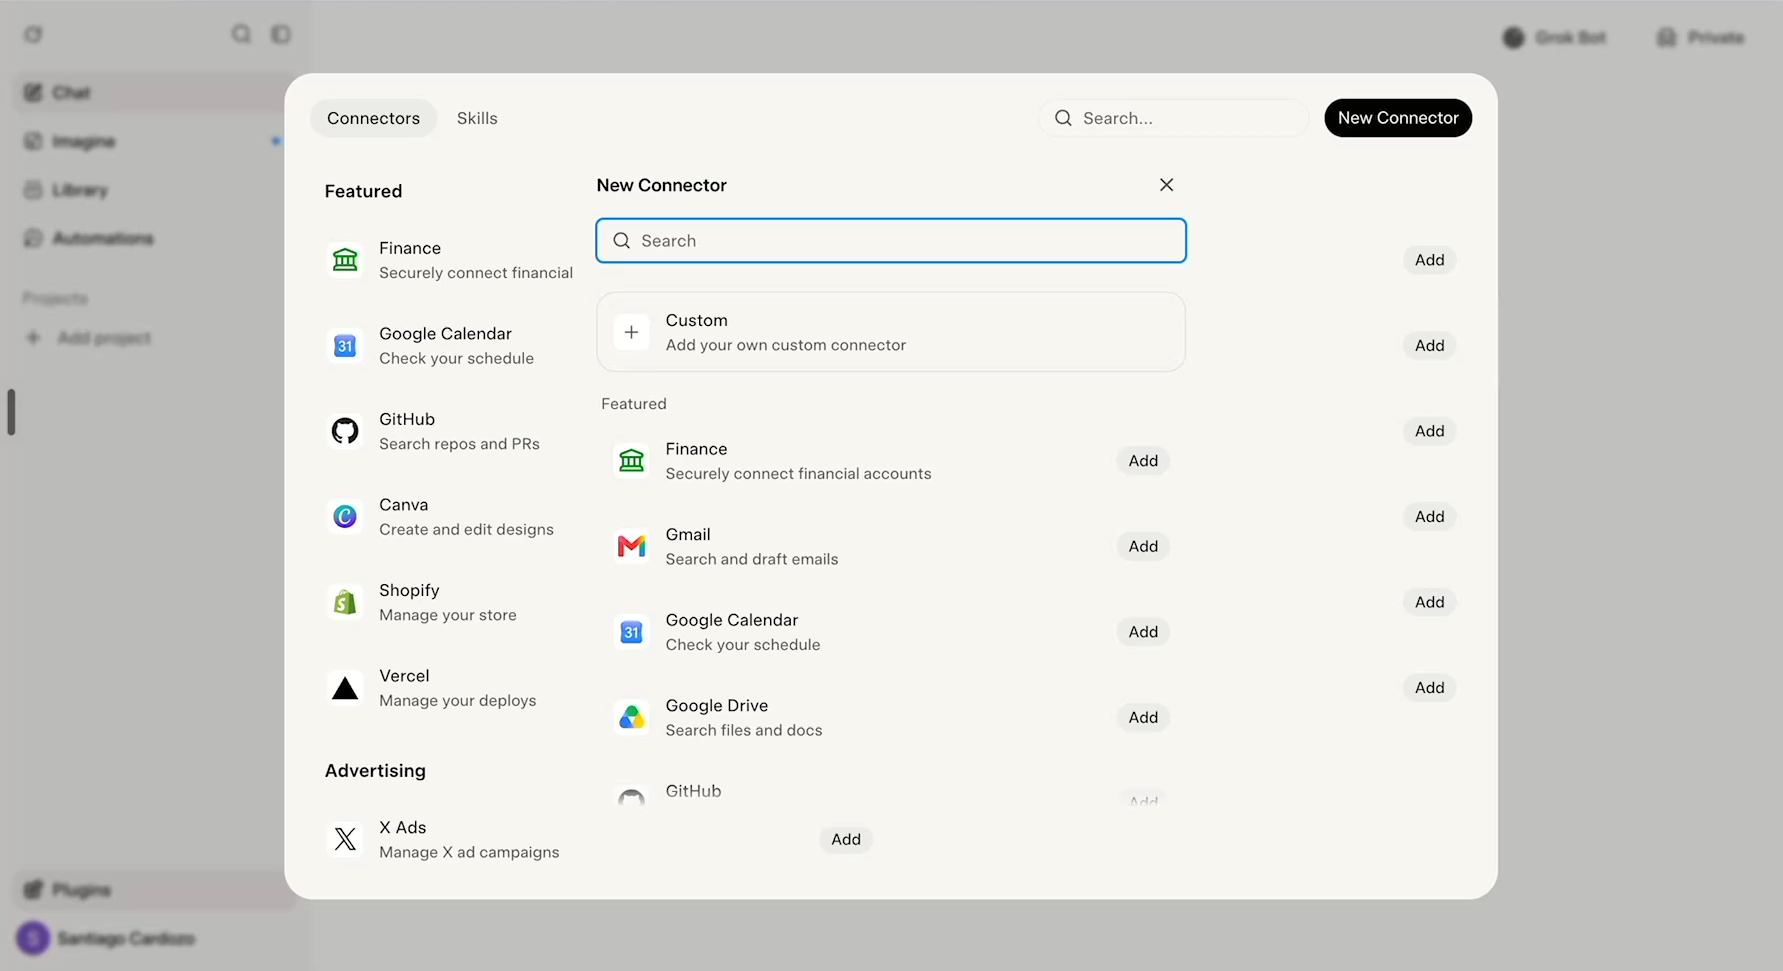
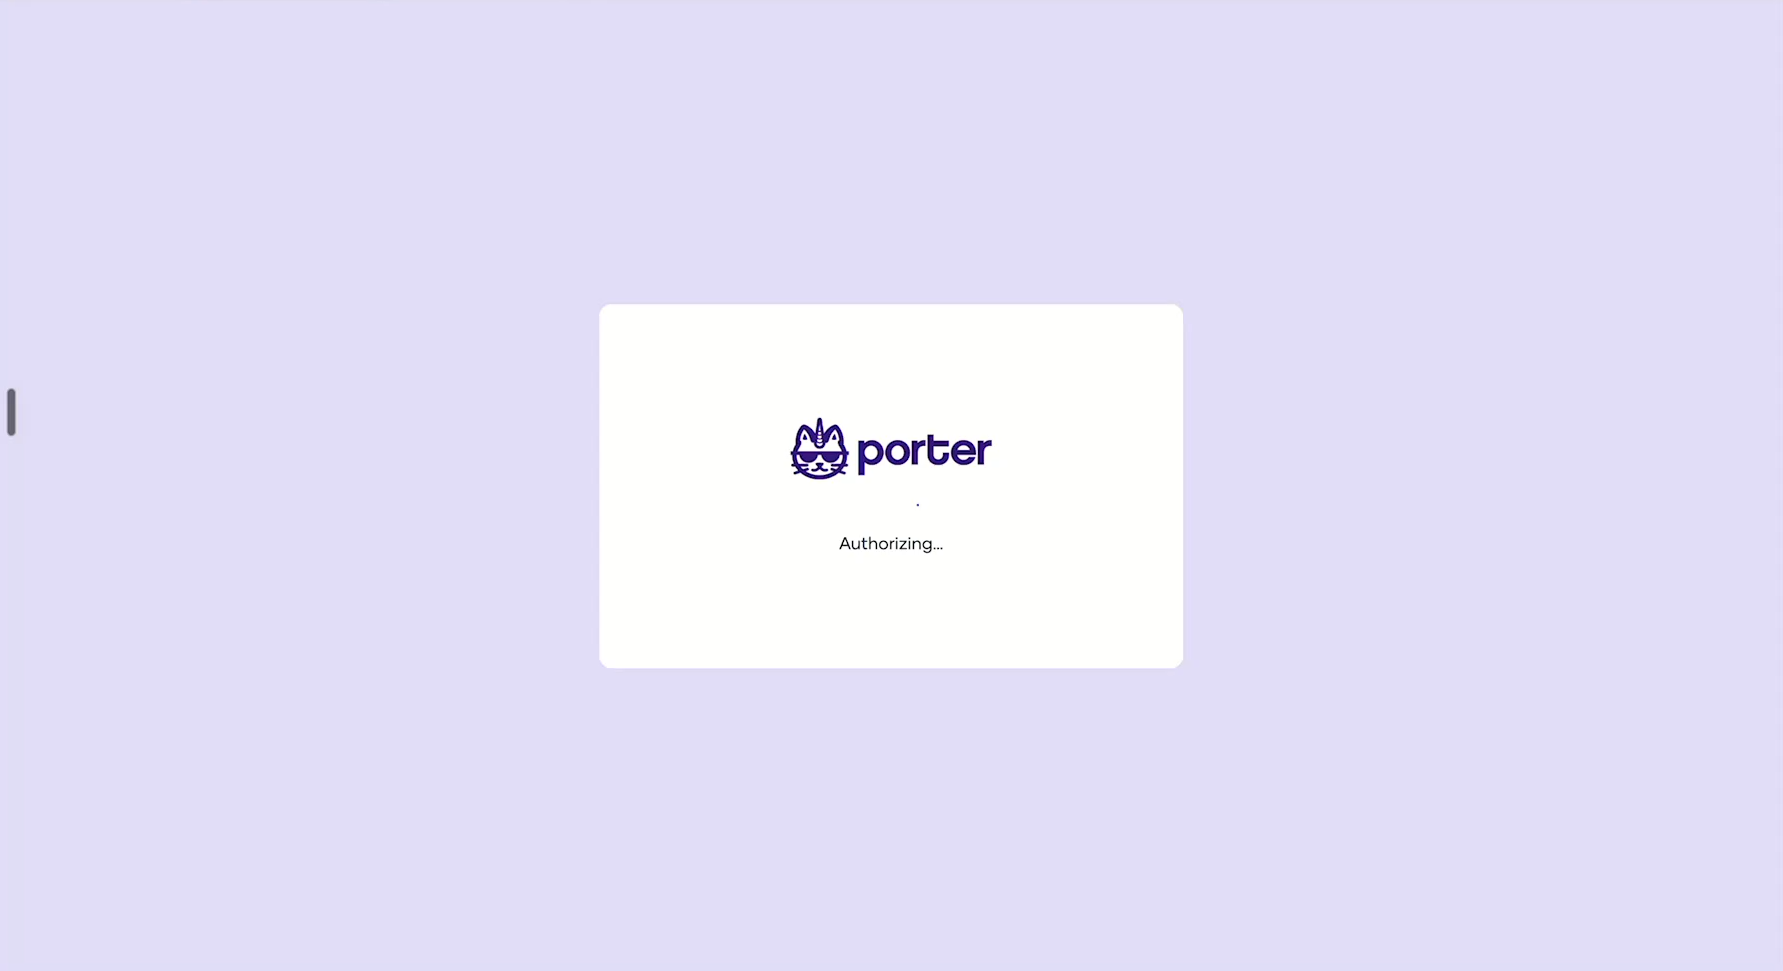
Follow these 10 steps in the same order as the Connect Grok to Porter MCP demo. Menu availability can vary by account and workspace.
MCP connection details
In Grok, open Connectors → New Connector → Custom.
Porter Metricshttps://mcp.portermetrics.com/mcpClick Add Connector, review the access request, then click Allow Access. Wait for authorization to finish.
How to verify the connection is working
In Connectors, confirm that Porter Metrics appears under Connected with the status Added. The demo ends with the message Connector added successfully.
Then try asking Grok: Using Porter, list the data source accounts I have connected. If no accounts appear, check that your marketing sources are connected to the Porter account you authorized.
What you can do with Grok + Porter Metrics
Once connected, the Porter MCP unlocks these everyday marketing workflows:
Example prompts to try
Copy any of these prompts into a new Grok conversation (with the Porter connector enabled) to see what the integration can do:
Supported data sources and integrations
The Porter MCP covers the same 25+ data sources Porter supports in Data Studio, Google Sheets, Power BI, and BigQuery:
Considerations, security, and limitations
Before you roll this out to your team or clients, here are the things worth knowing:
Authentication and data access
Review the Porter Metrics access request before clicking Allow Access. Use the Porter account that has access to the marketing sources you want to query.
Data privacy
Connected data can be returned to Grok to answer your questions. Review your organization’s data-sharing requirements and the permissions shown during authorization before connecting.
Rate limits and query size
Queries return up to 1,000 rows per request and respect each platform’s native API rate limits (e.g., Google Ads API quotas, Meta Graph API limits). For large exports or bulk data, use Porter’s Data Studio, Sheets, or BigQuery connectors instead.
Pricing: how it works
The MCP is already included in your Porter plan — there is no extra fee for connecting Grok. Porter only charges for the data source accounts you connect (for example, one Meta Ads account = one data source account). The same account you already pay for in Data Studio, Sheets, or BigQuery is the same one you use in Grok — no double billing.
In short: you pay per data source account, and that account works across every destination Porter supports (Data Studio, Google Sheets, BigQuery, and AI tools like Grok). Note that the Grok subscription itself is billed separately by xAI.
See full pricing details at portermetrics.com/pricing.
Troubleshooting common issues
If something isn’t working, check this list first:
grok.com and try again. On the desktop app, check that your default browser is set correctly in system settings.Still stuck? Contact Porter support and include the error message plus the prompt you tried.
Frequently asked questions
Open Grok → Connectors → New Connector → Custom. Name the connector Porter Metrics, enter https://mcp.portermetrics.com/mcp in Server URL, and click Add Connector. Review the authorization request and click Allow Access. Wait until Porter Metrics appears under Connected with the status Added and the message Connector added successfully.
Check whether your Grok account offers Connectors → New Connector → Custom. Availability can depend on your account and workspace settings. This guide follows the interface shown in the demo.
Use Porter Metrics as the name and https://mcp.portermetrics.com/mcp as the Server URL.
Porter Metrics appears under Connected with status Added. The confirmation message is Connector added successfully.
Check that your data sources are connected in Porter and that you approved access using the correct Porter account.
The Grok demo does not show a domain allow list field. Follow the connector name, Server URL, and authorization steps shown here.

Ready to chat with your marketing data?
Open Grok, add the Porter Metrics connector, and ask your first question. If you don’t have Porter yet, start a free trial and connect one data source — you’ll be talking to your data in under five minutes.
rocket_launchStart free Porter trial open_in_newOpen Grok